If you are looking for a better way to manage all your emails, why not use an email client like Microsoft Outlook? It is mainly used for receiving, sending, and storing emails. However, it has hundreds of other features such as calendars, tasks, contacts, and many more.
In this article, we’ll show you how to set up your email accounts in Microsoft Outlook.
- Requirements
- How to Set up Outlook
- Microsoft Outlook 2019
- Microsoft Outlook 2016
- Microsoft Outlook 2013
- IMAP vs POP
- Finding the IMAP/POP and SMTP Configuration
Requirements
There are a few things that you must prepare before you start configuring the email client. and if you are our customer we will be sharing with you all the required details at the time of website delivery.
- Domain name – example.com
- Your email address – admin@example.com
- Your email password
- IMAP/POP and SMTP configuration
Assuming you already have a domain and created an email with us, you must already have the first requirement mentioned. However, to access your email through an email client, you must have the details of incoming (IMAP/POP) and outgoing (SMTP) servers, which will be shared with you from your hosting provider, or else you can log in to CPanel and get it from there
How to Set up Outlook
Now that you’ve taken care of the requirement, it’s time to learn how to set up Outlook.
Microsoft Outlook has many different versions that warrant different sections for each one of them. The versions we’re going to discuss are Outlook 2019, Outlook 2016, and Outlook 2013. some of you might have Outlook 2007 so better upgrade your software.
You need to make sure which version you are using since the settings are a little different for each version.
Microsoft Outlook 2019
Here, you will learn how to set up version 2019 Outlook.
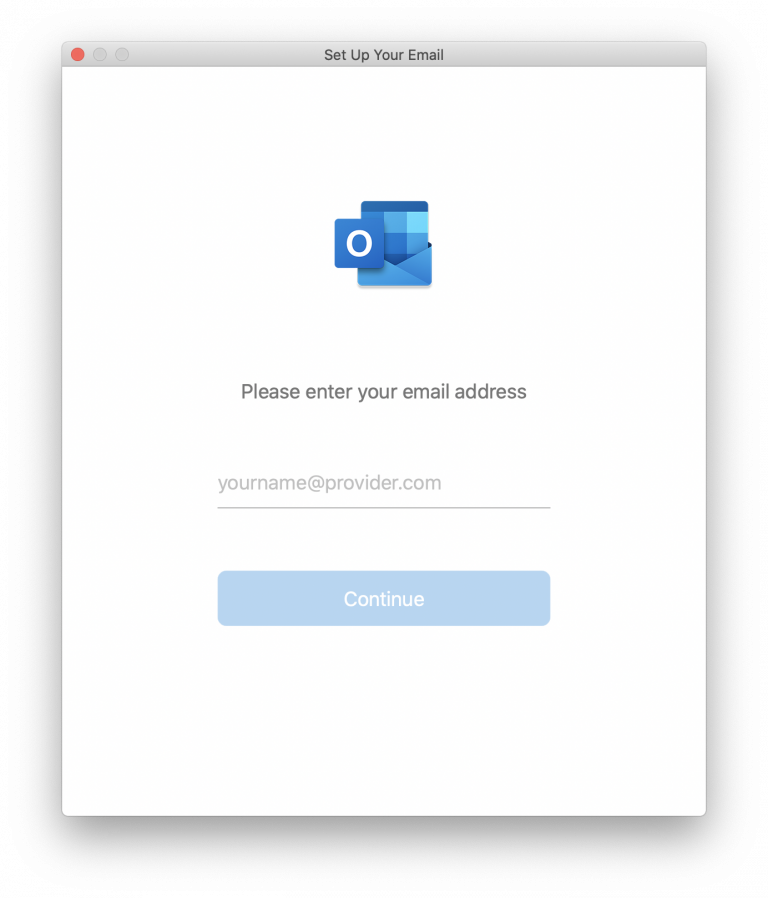
1. Open Microsoft Outlook 2019
When a window pops up, enter your email address, then click Continue. If you are trying to add an additional account, click add account.
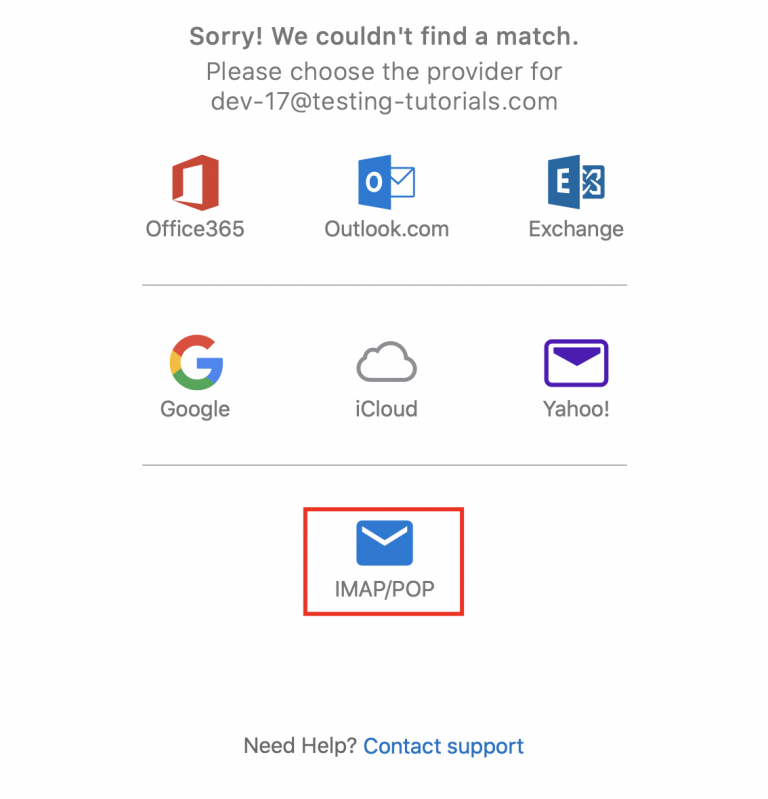
2. Choose IMAP/POP
Select IMAP/POP, when given the option to choose your provider. This will allow you to set up your outgoing mail server and incoming mail server.
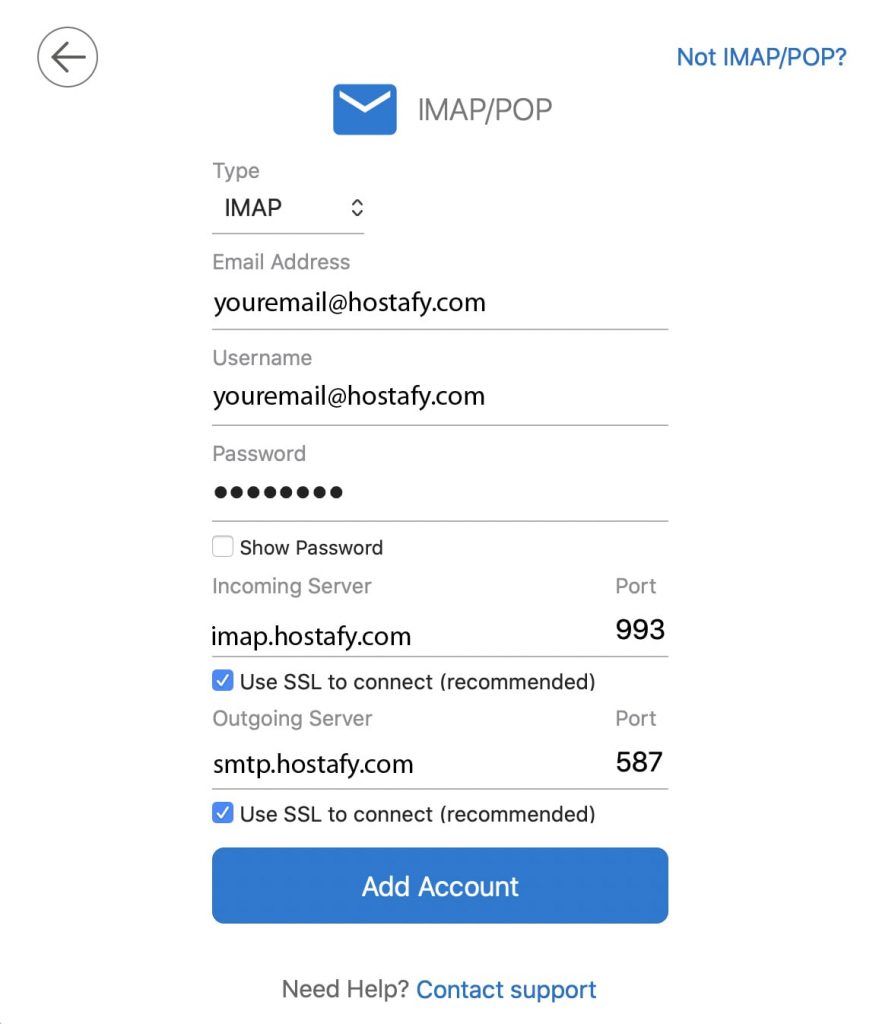
3. Configure Your IMAP or POP Settings
Whether you choose POP or IMAP, fill in the corresponding details as can be seen below. Then, click Add Account to proceed. If you don’t know which one to choose, check out this article on POP and IMAP.
Here, I am taking a domain as Hostafy.com you can use your own domain name and Email ID
4. Finalize Your Setup
Fill in your email address password, click Connect, and wait for the process to finish. If you succeed, the window below will appear.
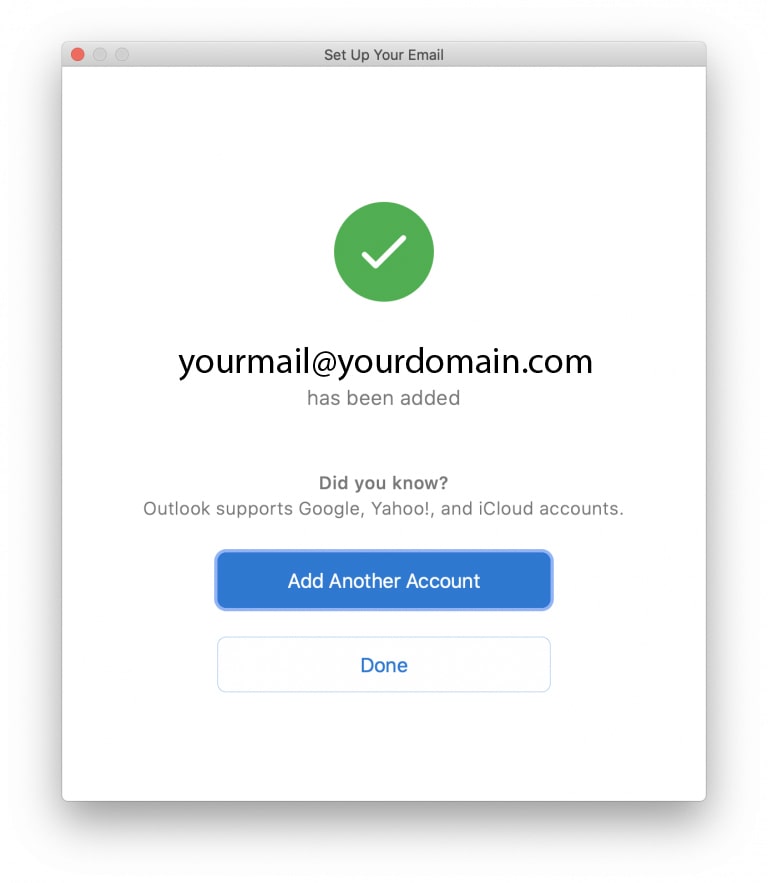
That’s it! All that’s left to do is click the Done button and you can start using Outlook for your email account right away.
Microsoft Outlook 2016
Here, you will learn how to set up version 2016 Outlook.
1. Open Microsoft Outlook 2016
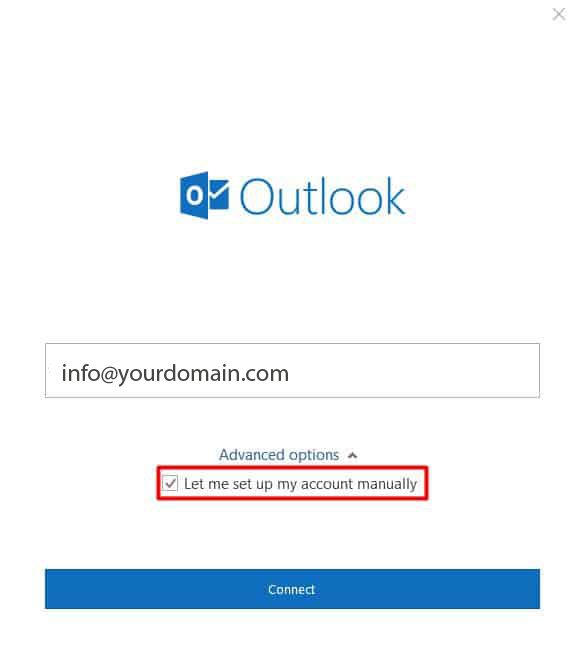
If you’re opening the client for the first time, a window will appear. Enter your email account information and don’t forget to tick the box. Then, click Connect.
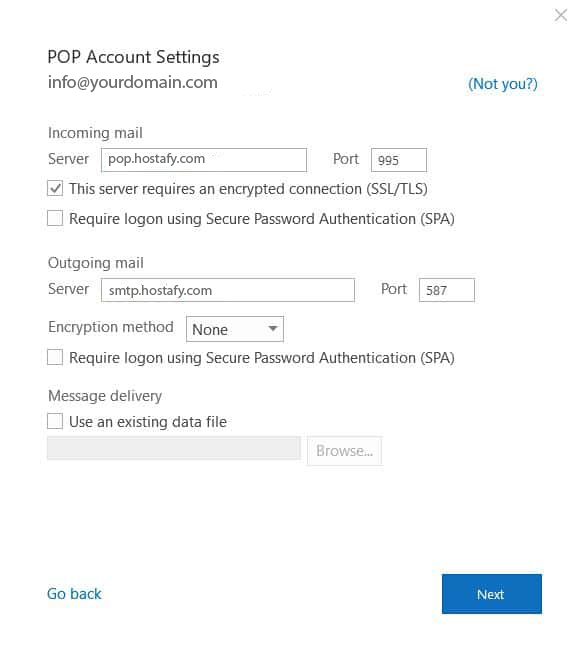
2. Configure the POP/IMAP and SMTP servers
When the next window pops up, choose between POP and IMAP.
When the window below shows up, fill in the forms with the settings from your control panel, and click Next to proceed. Then enter the password to your email address and click Connect.
3. Finalizing the Setup
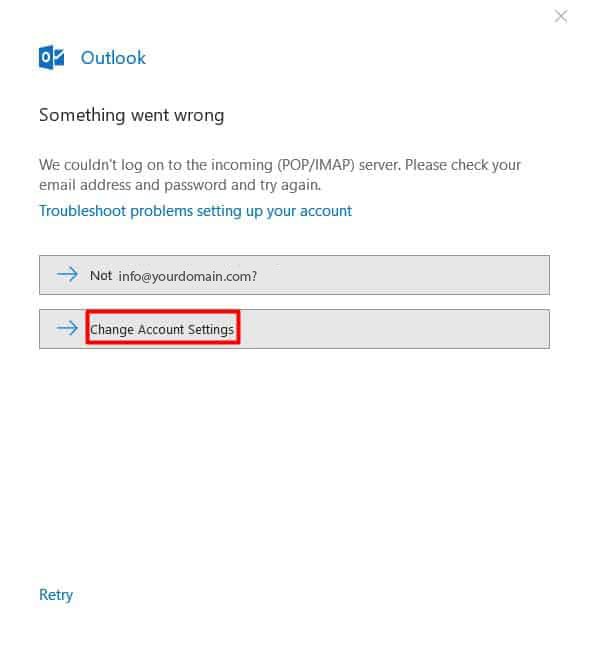
If an error window appears, you have to readjust the configuration by clicking Change Account Settings and make sure that all the settings are correct.
However, if you set the configuration correctly, you’ll see this window on your screen.
Depending on your choice, either POP or IMAP will show on the list. Next, click Done and you’ll be navigated to Outlook 2016 interface.

Microsoft Outlook 2013
Here, you will learn how to set up version 2013 Outlook
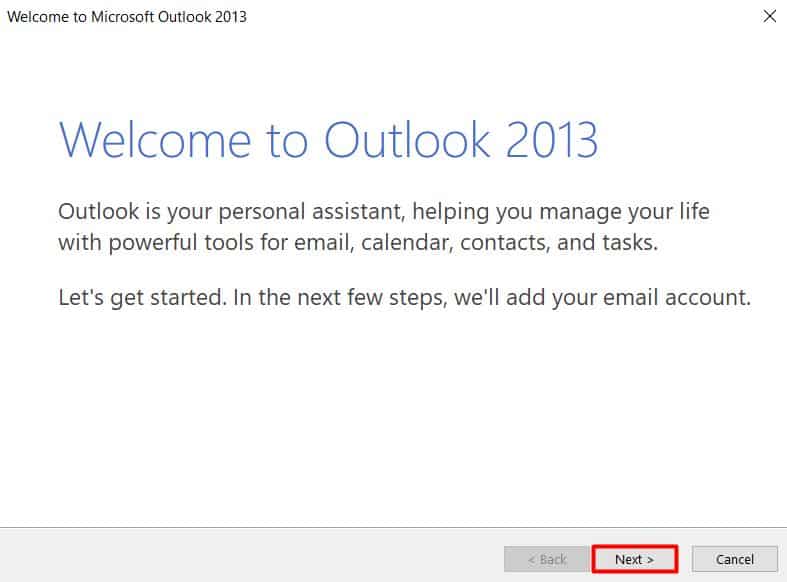
1. Open Microsoft Outlook 2013
A window welcoming you for the first time will pop up. Click Next to proceed with your setup.
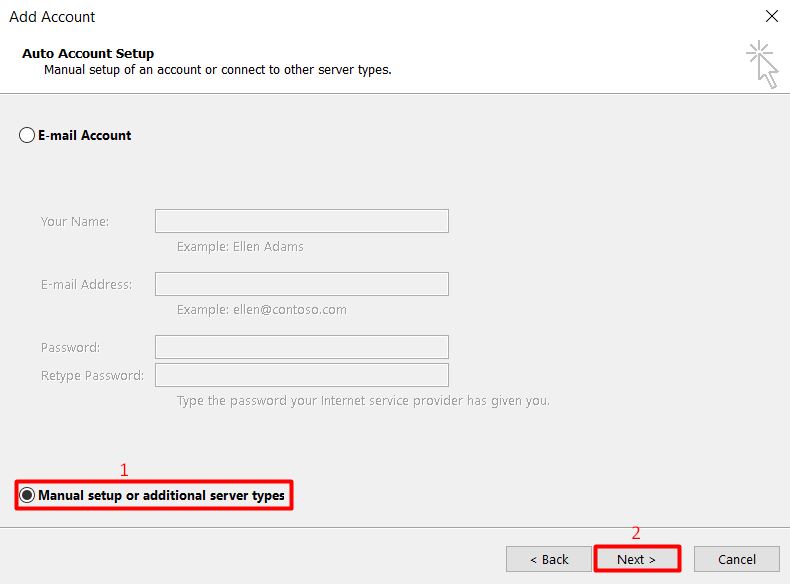
2. Configure Your Email Account
When the next window appears, tick Yes and click Next once again.
Then, choose the option for “Manual setup or additional server types”, enter your email address, password, and proceed to the next window.
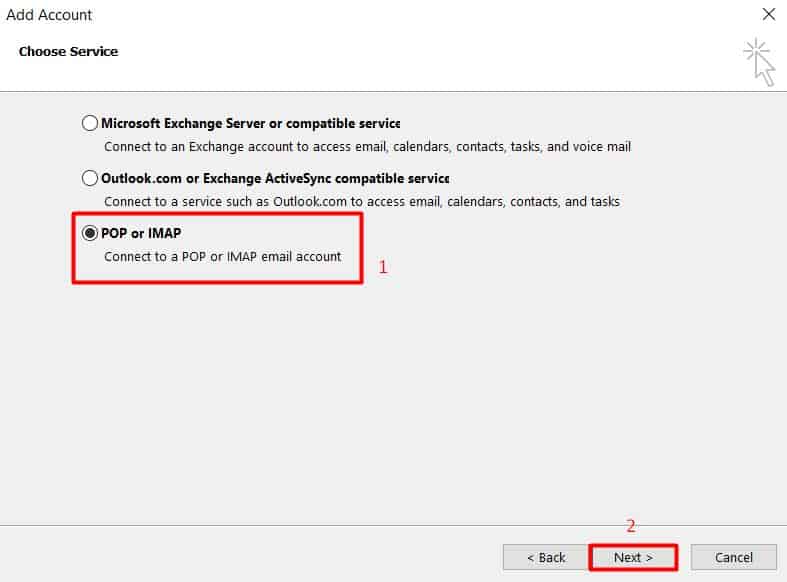
On the screen below, choose POP or IMAP and click Next to proceed.
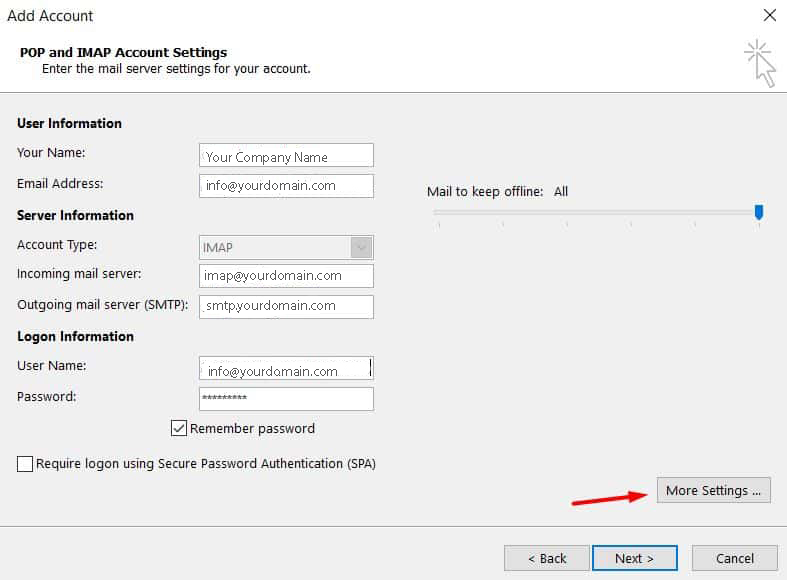
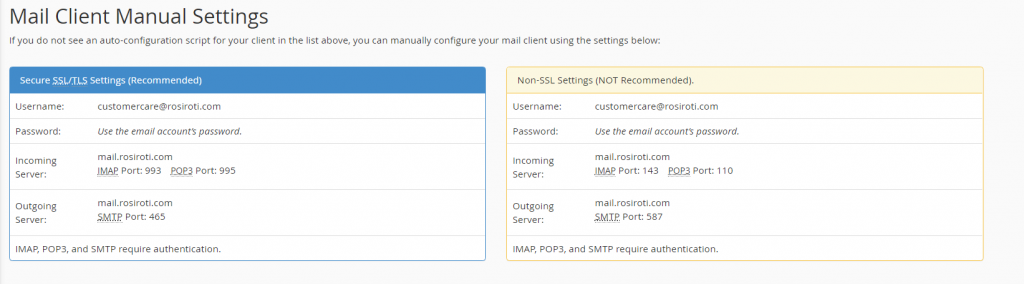
Enter the corresponding settings in the following forms. Choose your desired account type (POP or IMAP), fill in both incoming mail server and outgoing mail server with the information you got from your control panel, and insert your full email address on the user name column along with the password.
Then, click More Settings.
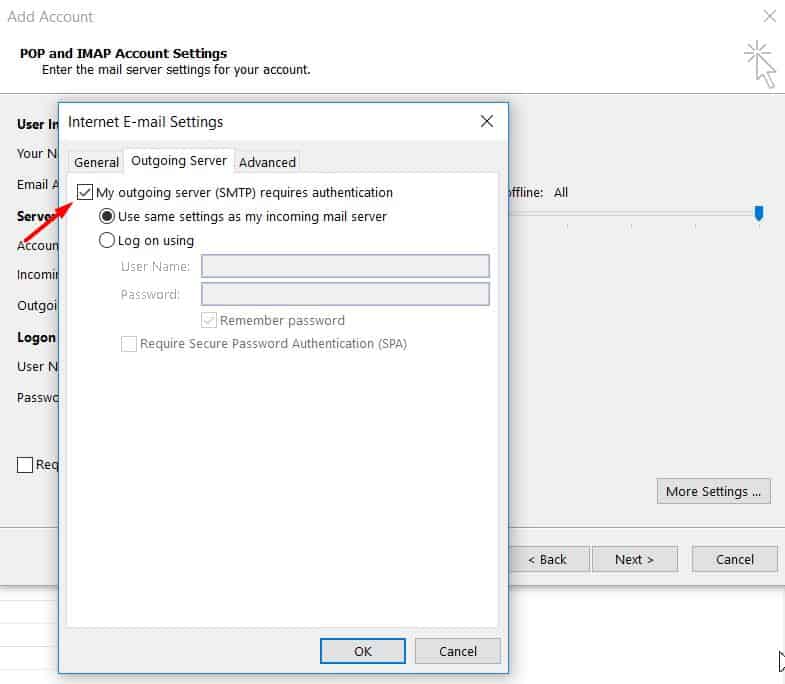
In the next popup window, navigate to the Outgoing Server tab and tick the box behind “My outgoing server (SMTP) requires authentication”. Then, select “Use same settings as my incoming mail server” as seen below.
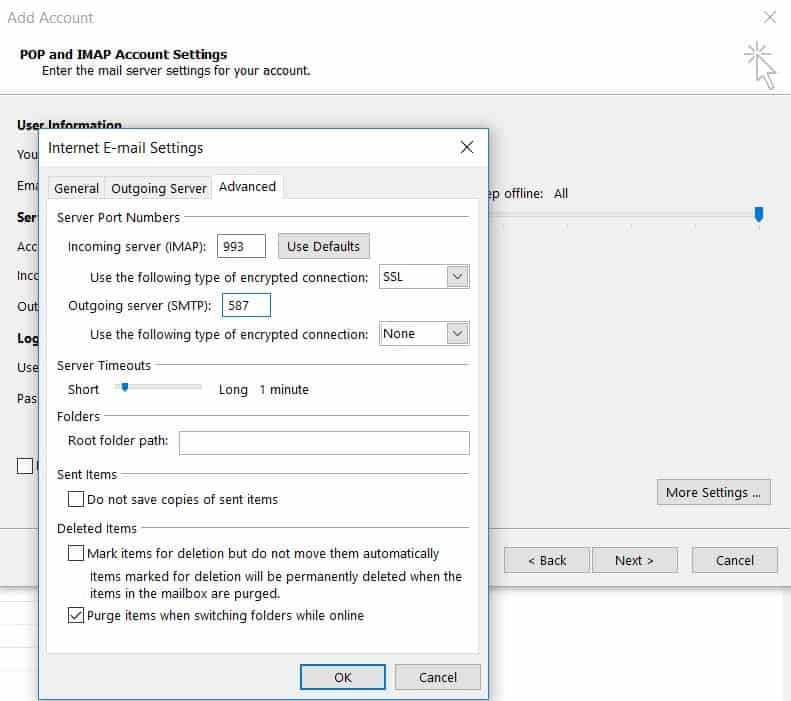
Then, go to the Advanced tab. Fill in the server port numbers and encrypted connection as seen below, then click OK.
3. Finalize Your Setup
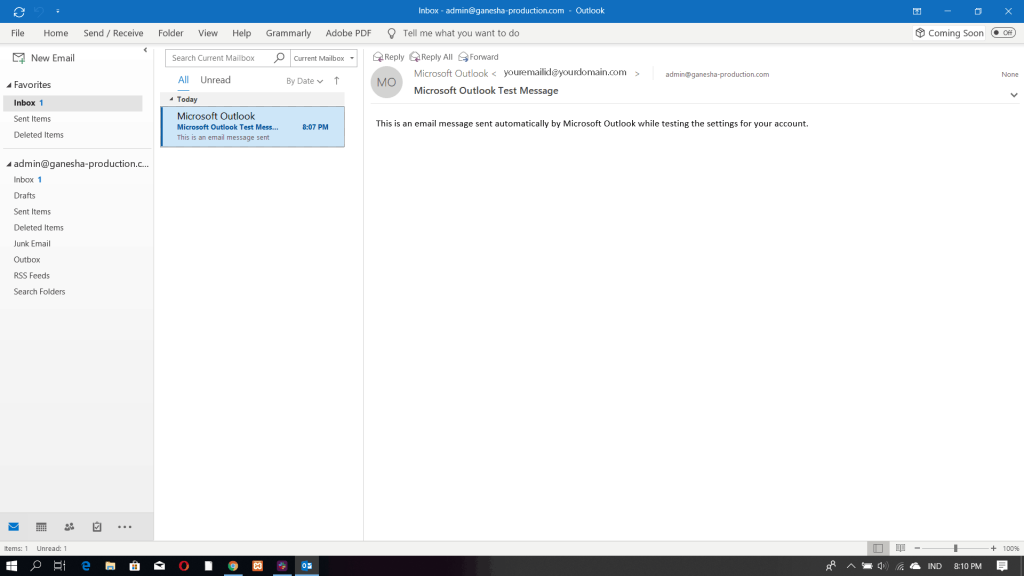
After that, click Next and Outlook will test your account settings to see if things are going well. It will look like the screen below if it succeeds.
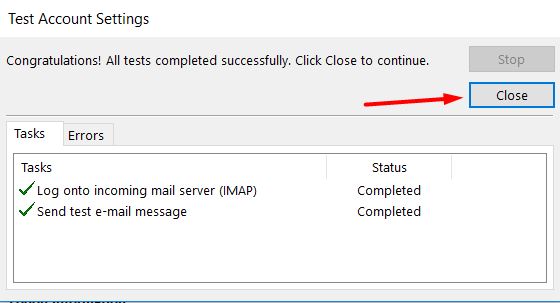
Then, just click Close and a window prompting that the setup process has finished will appear.
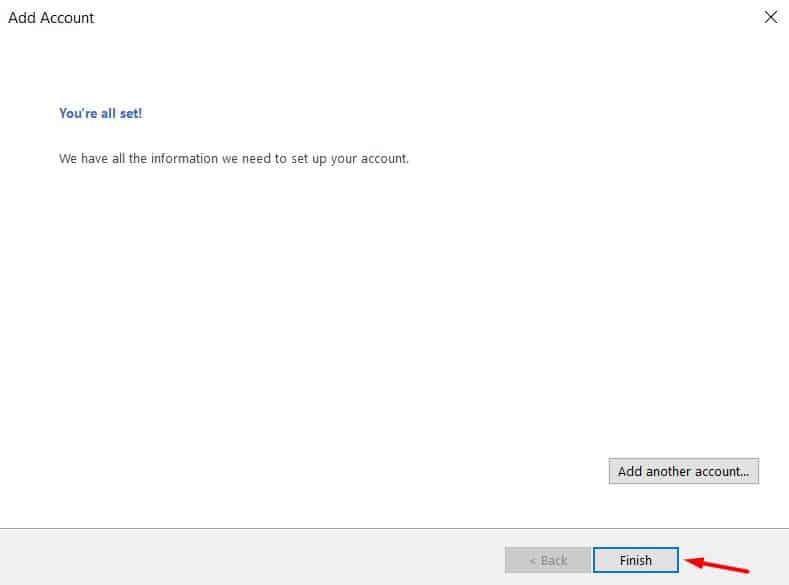
Just click Finish to be directed to Microsoft Outlook 2013 interface as seen below.
IMAP vs POP
So, what’s the difference between IMAP and POP?
IMAP (Internet Message Access Protocol) makes it possible to sync in real-time with the servers on webmail.
For example, if you mark a message as unread on your Outlook mail account, then the real email on the server is marked as unread too. This choice is preferable if you want to use Outlook on multiple devices.
POP (Post Office Protocol) downloads and stores your email locally. Any changes you make on Outlook won’t appear on the webmail.
However, you can still set your Outlook mail account to make changes on the server – deleting, saving drafts, and so on. The upside to POP is even when you have no internet connection – or the server goes down – you can still access your email.
Finding the IMAP/POP and SMTP Configuration
Different hosting providers have different configuration processes.
If you are a Cpanel user, navigate to your control panel and scroll down to the Emails section.
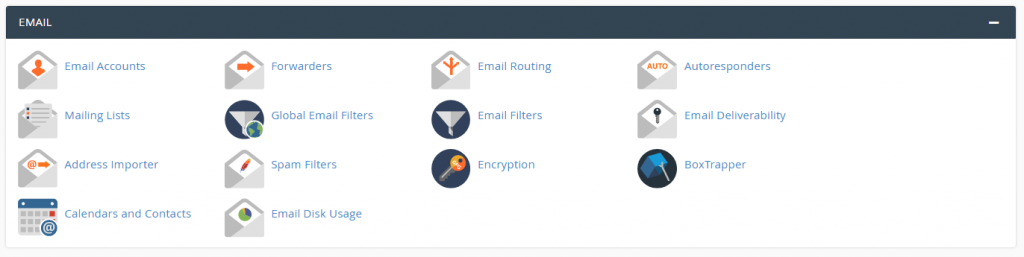
After you click on Email Accounts, scroll down a bit to see the information you need under Email details.
You may copy-paste the details to a Notepad file for safekeeping or simply leave the page open – you’ll need to use this to set up your email on Microsoft Outlook.
Conclusion
Setting up Outlook isn’t as daunting as you might think. The whole process is straightforward and will only take a moment of your time. it can be done by yourself or you can contact us for any query if you are our customer.
OGEN Infosystem will take care of your digital assets like domain registration, renewal, hosting, and valuable email if any. our hosting partner is “www.Hostafy.com”
Also if you are looking for a website designing company or Mobile App Development Company Contact us at +91 7428980042 / Email us your requirement at info@ogeninfo.com
If you face any issues, just refer to this tutorial on how to set up mail for Outlook.